
10 Baking Tips for Chocolate Chips
This statement may be a bit insulting, but I’ll say it anyhow: Pretty cookies are, well, pretty! Yes, “Captain Obvious” is indeed my middle name — it’s a family name. But seriously, people are more likely to want to eat a cookie that looks nice over one that looks sloppy. It’s just like dressing up for an interview. You could be the most qualified candidate possible, but, if you show up to the interview in denim cut-offs and a blood-stained T-shirt, you’ll never get hired (unless you’re interviewing to be a Mafia hitman). So, the moral of this post is as follows: Don’t dress your perfect cookie dough in denim cut-offs and blood-stained T-shirts (Health Dept. complaints aside) – dress to impress! Bake to take the cake!!

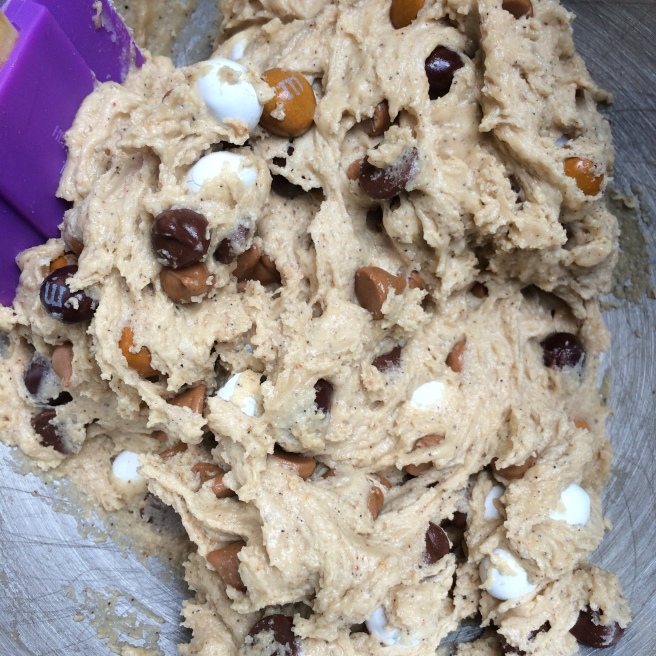
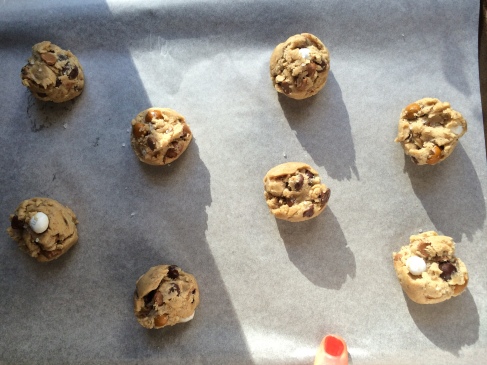
1. Raw dough

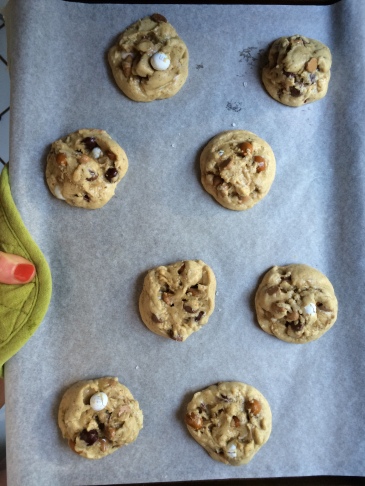
2. Halfway through baking

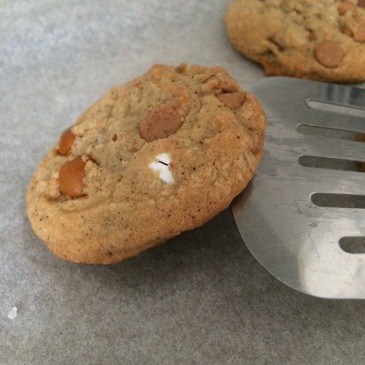
3. Fresh out of the oven

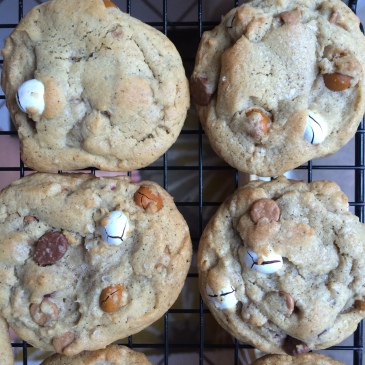
4. 3 minutes later on sheet
It’s certainly true that there’s no universal, foolproof handling method appropriate for all cookie doughs. Different butter:oil, brown sugar:white sugar, AP flour:cake flour ratios all factor into baking behaviour. So, rather than trying (and failing) to be a Jack-of-all-bakes, I’ll focus this post on the most ubiquitous of all cookie doughs: the Classic Chocolate Chip (seen here featuring seasonal m&ms).
My main purpose today is to share little tips and tricks to get those nice, round, profesh-looking cookies that sell big at bake sales and fly off the platter at social gatherings. These steps, if followed, add extra time to the cookie-making process, but it’s truly a labor of love, so try not to cut corners!
-
Always chill the dough PRIOR to making any shaping attempts. This step ensures thorough homogenization of all ingredients without overworking the dough by heavy mixing. Overmixing leads to tough cookies, but undermixing leads to uneven bakes and creates the potential for unpleasant pockets of unincorporated ingredients (clumps of baking soda in your cookies will impress NOBODY…not even your mom).
- Chill out
-
Let the dough return to room temperature before handling it again. If you try to handle rock-solid, chilled dough, you risk breaking up your mix-ins when trying to hack off shapeable dough hunks. Also, if your dough is too cold when you go to bake it, the butter in the dough will not melt at the correct rate during baking, and the cookies will be raw in the center but brown on the exterior.
- Wait until the dough is soft again to mold your cookies
-
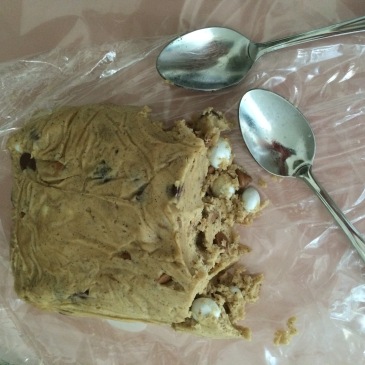
Use two spoons to shape the dough blobs, instead of your grubby hands. Unless you’re dead – which I sincerely hope you’re not – your hands are probably pretty warm. Even if you’re one of those people with perpetually “cold hands” (cough, cough – me), your hands are still warm when compared to a butter-containing cookie dough. Rolling the dough between your sweaty mitts will result in a cold interior and a significantly warmer exterior. The result, when baked, is a cookie with thin, over-cooked edges and doughy centers.
- Spoon, don’t fondle
-
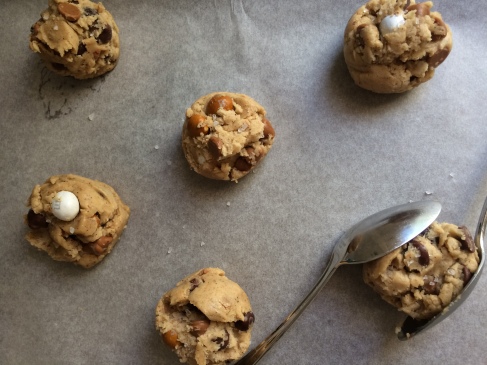
Space the dough blobs sufficiently. As romantic as “kissing cookies” are, there’s nothing attractive about the one flat side that results when you divorce the conjoined cookies. Perhaps Dr. Ben Carson could make them both round again, but we’re just humble bakers, not neurosurgeons. A good rule of thumb is to allow for ~2″ between tablespoon-sized dough blobs.
- 2″ apart = non-conjoined when baked
-
Always preheat your oven. There are a lot of unpredictable factors that can affect your bakes; a full oven preheat reduces that number by one!
-
Rotate your baking sheets. About halfway through the listed baking time, rotate your baking sheet 180-degrees (I actually like to wait about a minute after the halfway mark to rotate, since the cookies bake more during the second half because they have had more time to reach oven temperature). This step ensures more even baking of your cookies so they all look about the same. Uniformity in appearance of cookie shape is just as important as uniformity in the relative doneness of each cookie. They should look like an armada of Stormtroopers, not Dumbledore’s Army.
- Halfway through baking, the cookies should look like this
-
Remove cookies from oven at EXACTLY the right time. How do you know? Not always easy, but there are a few things to clue you in. Look at the tops first – they should no longer look wet, and you should be able to see teeny-tiny cracks starting to form on the surface. Then look at the edges; they should JUST be starting to turn a light golden brown.
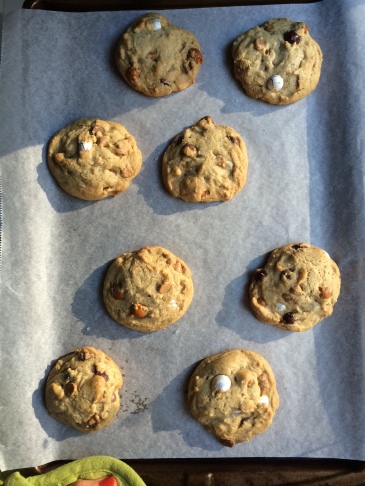
- Cookies should be puffy at initial extraction from the oven
-
Treat your cookies like a good steak — let them rest. The cookies should be puffy immediately upon removal from the oven, and they are very delicate at this stage. If you try to remove them from the pan now, they will likely break apart and/or sag through the holes in your cooling racks. Instead, remove the cookie sheet from the oven, then DON’T TOUCH THE COOKIES FOR 3 MINUTES! Only then should you remove the cookies to wire racks for complete cooling. A good way to know that the cookies are safe to transfer from the sheet is to try to lift up one side of the cookies with your spatula to see if the bottom has set — if your cookie bends or sags, they likely have not baked long enough, so you may need to return them to the oven.
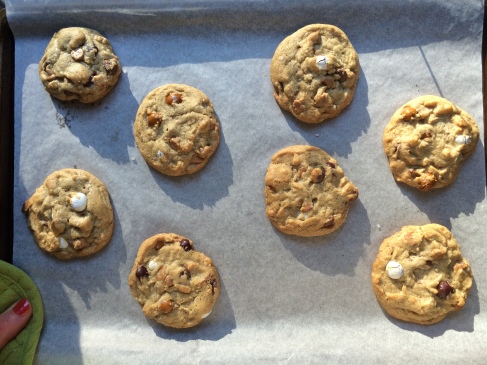
- A 3 minute post-extraction rest allows the cookies to deflate and solidify
- Test result: No soggy bottom here!
-
Let cookies cool COMPLETELY before storing. Be careful to not let the cookies sit on the sheets TOO LONG, though, because air cannot circulate under the cookies when they are on the sheets, so your cookies can develop soggy bottoms. Wire racks are the best way to avoid this problem. After waiting the requisite 3 minutes of no-touch-time, allow a solid hour of wire-rack-cooling time to make sure that you aren’t boxing up warm cookies. Packaging cookies in airtight containers while they’re still cooling creates a humid environment that can also result in soggy cookies.
- The rack: medieval torture device and modern baker’s staple
-
Share. I’m not going to explain this one — it just makes sense!

Share your cookie baking tips with me — I’m always on the hunt for more. The quest for cookie perfection is a lifelong journey 🙂


5. Ready for the racks

With it being National Homemade Cookies Day, I’m sufficiently inspired to Buhh-Aaaaaake (my attempt at typing out Sue and Mel’s synchronized order at the start of each GBBO challenge). I’ll be sure to use these tips!!
LikeLike
Internally, I read that as the Sue-Mel directive even before reading your parenthetical clarification!!! #birdsofafeather #baketogether #gbbo
LikeLike